The Ultimate Guide to Garden Fencing: Repairs & Storm Protection
Written by Vincent O’Connell, Co-Founder of The Tree Amigos Landscaping & Gardening Published: September 2026
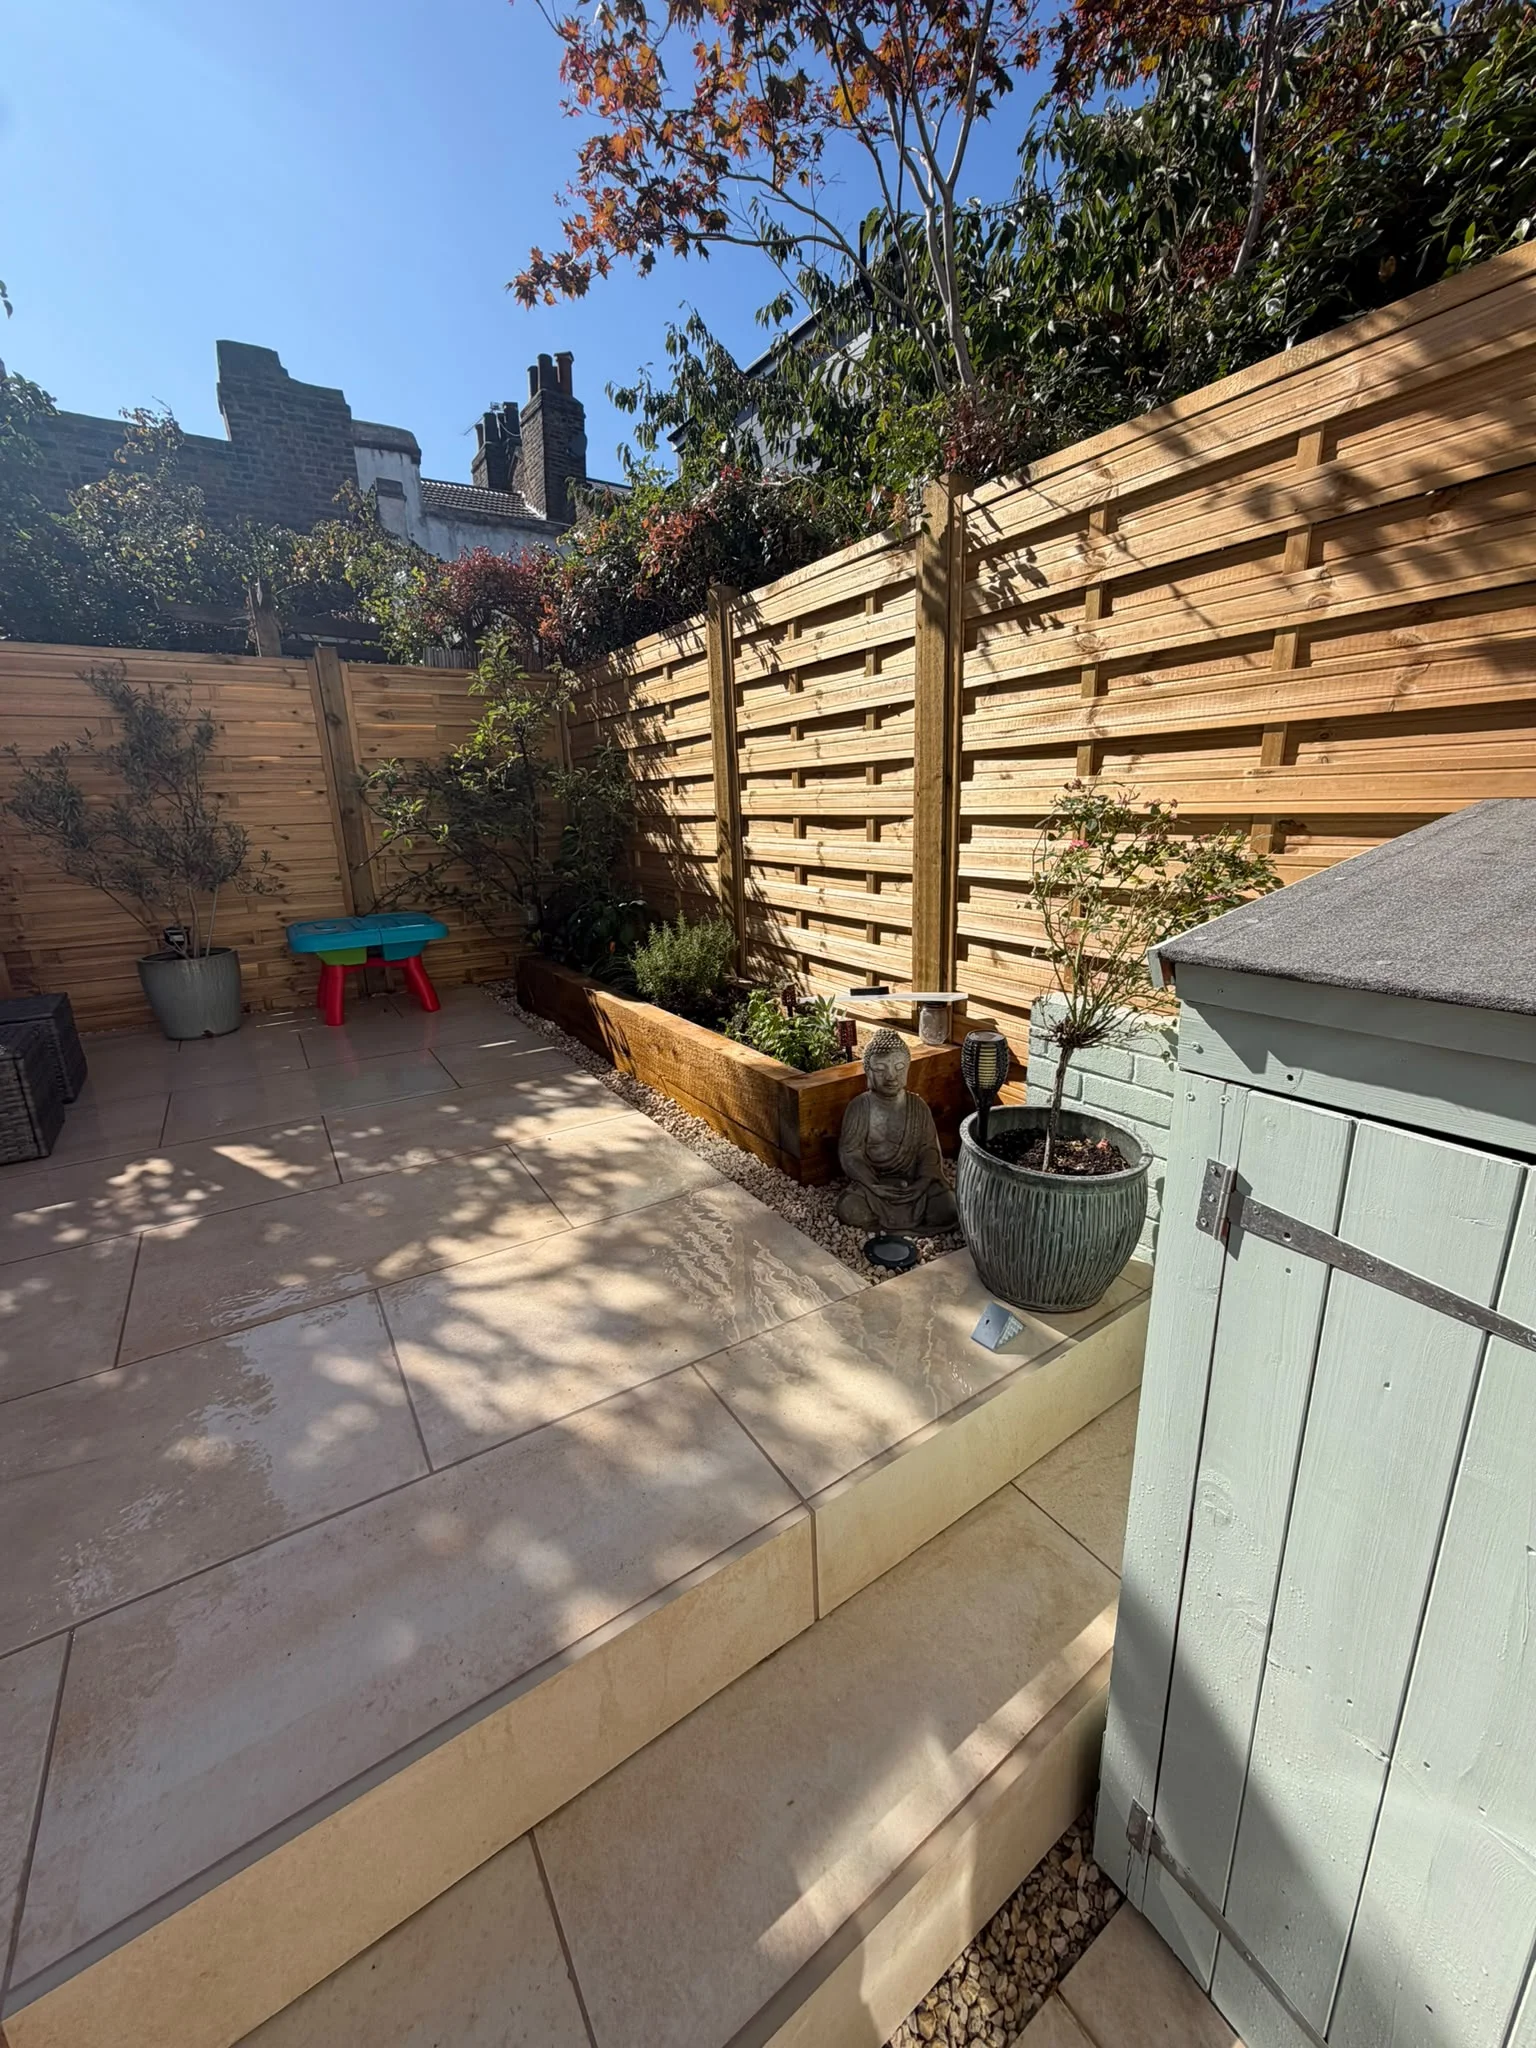
A sturdy garden fence protects your property, defines your space, and adds curb appeal—but the Atlantic storms that sweep across London every autumn and winter can turn a minor weakness into costly damage overnight. This guide covers everything you need to know about garden fencing: choosing the right materials, installing a long-lasting boundary, diagnosing faults, carrying out repairs, and storm-proofing your fence before the next gale.
At The Tree Amigos Landscaping & Gardening Ltd, founders Billy Maddox and Vincent O’Connell install and repair fences across all 32 London boroughs, with a strong focus on South East London—Greenwich, Blackheath, Woolwich and Plumstead. Everything below comes from hands-on experience on real London gardens and their heavy, water-holding clay soil.
Why Your Fence Matters (More Than You Think)
Your garden fence isn’t just a boundary—it’s a key part of your home’s defence system.
- Security & privacy: A solid closeboard or feather-edge fence deters intruders and shields your garden from neighbours and passers-by. For overlooked London gardens, layered screening works even better—see our garden privacy guide.
- Weather protection: Well-built fencing reduces wind speed across your garden, protecting plants, sheds, and patios.
- Property value: Neat, well-maintained fencing improves first impressions and can add value when selling or renting.
- Legal & neighbour relations: Clear, compliant boundaries reduce disputes and help you avoid issues with councils or housing associations.
Types of Garden Fencing: Which Is Right for Your Garden?
Not all fences are built the same. The best choice depends on your priorities: privacy, security, aesthetics, budget, and how exposed your site is to wind.
Closeboard Fencing
Closeboard (feather-edge) is the UK’s most popular residential fencing style—and one of the most robust choices for exposed London boundaries.
- Construction: Overlapping vertical boards fixed to horizontal rails, with concrete or timber gravel boards at the base.
- Best for: Privacy, wind resistance, and a traditional look.
- Storm performance: Good when built with adequate post depth, concrete footings, and quality fixings.
Featheredge & Lap Panels
Factory-made panels are quick to install but often less robust than custom closeboard.
- Pros: Fast, cost-effective, consistent appearance.
- Cons: Thinner rails and lighter posts can fail in high winds if not properly supported.
Cedar Slatted & Venetian Fencing
The premium contemporary choice for modern London gardens—horizontal Western Red Cedar battens fixed with narrow shadow gaps.
- Best for: Architectural looks and privacy that still lets light through.
- Storm performance: Excellent when deep-set on solid posts. The gaps let gusts pass through instead of catching the wind like a solid sail. It’s our most-requested boundary; see our cedar slatted fencing and London fence installation services.
Picket & Post-and-Rail
Open designs that suit front gardens, rural properties, and estates.
- Best for: Aesthetics and boundary marking rather than privacy or security.
- Storm performance: Better wind passage reduces load, but posts still need solid foundations.
Trellis & Lattice
Often used as a decorative topper or standalone screen.
- Use case: Light screening, plant support, and visual interest.
- Caution: Large trellis panels act like sails in strong winds unless braced and fixed with corrosion-resistant hardware.
Security Fencing (Palisade, Weldmesh, Railings)
Common for commercial sites, schools, and high-risk residential boundaries.
- Strengths: High durability, anti-climb features, long service life.
- Considerations: Higher cost and more complex installation; usually overkill for typical back gardens.
Concrete & Composite Fencing
Low-maintenance alternatives to timber.
- Concrete posts and gravel boards: Resist rot and insect damage; ideal for wet, exposed sites.
- Composite panels: Wood-like appearance with minimal upkeep, but check wind ratings and fixing systems.
Planning Your Fence Installation
Good planning prevents expensive mistakes and ensures your fence lasts.
Check Boundaries and Permissions
- Confirm the exact boundary line with title deeds, Land Registry documents, or a surveyor if in doubt.
- For most domestic fences under 2m (or 1m next to a highway), planning permission isn’t required. London councils and conservation areas can differ, though, so check our guides on planning permission and fencing rules and styles in London before you build.
- Discuss plans with neighbours if the fence sits on a shared boundary to avoid disputes later.
Measure Accurately
- Measure the full run of the fence, noting gates, slopes, and obstacles.
- Allow for overlaps, gate openings, and any stepped or racked panels on sloping ground.
Choose Post Spacing and Heights
- Standard closeboard fencing typically uses 1.83m (6ft) panel widths with posts at 1.8–2.0m centres.
- For exposed sites, consider closer post spacing or heavier posts to increase rigidity.
How to Install a Long-Lasting Garden Fence
A strong fence starts below ground. Skimping on post depth or concrete is the most common cause of storm failure.
Prefer to skip the heavy part? Digging footings and setting posts dead-plumb in wet London clay is precise, back-breaking work—and it’s exactly the bit most DIY fences get wrong. We handle full fence installation across London so your boundary is built to last first time. The steps below are for the confident DIYer.
Step 1: Set Out the Fence Line
- Use string lines and pegs to mark the exact fence line.
- Check for underground services before digging (use a service-check tool or contact your utility provider).
Step 2: Dig Post Holes
- Hole depth: At least one-third of the total post length should be underground. For a 6ft fence, use 8ft posts with a minimum of 600mm (2ft) in the ground.
- Hole width: Around three times the post width to allow for proper concrete surround.
- On slopes, decide whether to step the panels or rack them to follow the ground.
- On London clay: Heavy clay holds water against timber and can shift in very wet spells, so good drainage in the base of the hole and a full concrete footing matter even more here than on free-draining soil.
Step 3: Set Posts in Concrete
- Place a layer of hardcore or gravel in the base for drainage, then set the post.
- Mix and pour concrete around the post, ensuring it’s plumb (vertical) and aligned with the string line.
- Allow concrete to cure fully before attaching rails or panels.
Step 4: Fix Gravel Boards
- Install concrete or treated timber gravel boards between posts, slightly above ground level.
- Gravel boards lift the main panels off damp soil, reducing rot and extending fence life.
Step 5: Attach Rails and Panels
- Use galvanised or stainless-steel screws and brackets rather than lightweight nails, especially in windy areas.
- Ensure rails are thick, solid, and well secured to posts.
- Fix panels evenly, leaving a small gap above gravel boards for drainage and expansion.
Step 6: Add Gates, Caps, and Finishes
- Fit robust gate hinges and latches; consider adjustable hook-and-band hinges for heavy wooden gates.
- Add post caps and capping rails to keep water out of end grain.
- Treat cut ends with timber preserver and apply a weatherproof stain or paint.
Common Fence Problems and How to Diagnose Them
Spotting issues early can save you from a full replacement after the next storm.
Leaning or Wobbly Posts
- Signs: Visible tilt, movement when pushed, gaps opening at panel joints.
- Causes: Shallow footings, poor concrete, rot at ground level, or saturated soil.
Rot and Decay
- Where to look: Base of posts, where panels meet gravel boards, and any areas in constant contact with damp soil or leaf litter.
- Signs: Soft, spongy timber; dark staining; fungal growth; crumbling wood.
Loose or Broken Panels and Rails
- Signs: Panels rattling in wind, visible gaps, cracked or split rails, missing or corroded fixings.
- Causes: Wind fatigue, poor fixings, impact damage, or timber movement from wet/dry cycles.
Gate Sag and Misalignment
- Signs: Gate drags on the ground, won’t latch properly, or hinges pull out of posts.
- Causes: Inadequate post size, loose hinges, or ground movement.
Garden Fence Repairs: Step-by-Step
You don’t always need a full replacement—many issues can be fixed with targeted repairs. Some are genuine DIY jobs; others, like rotted posts set in concrete or a storm-flattened run, are heavier and riskier than they look. For those, we offer dedicated fence repairs across South East London in Greenwich, Blackheath, Woolwich and Plumstead.
Repairing a Leaning Post
If the post is sound and the lean is minor, you can often brace the neighbouring panels, dig out around the footing, and re-plumb the post in fresh concrete. If the base has rotted, though, straightening won’t hold. The post has to be cut out and replaced, which means lifting the panels either side. That’s usually the point to bring in a pro, because a badly reset post simply fails again in the next gale.
Replacing a Damaged Panel or Rail
- Remove fixings: Unscrew or pry off the damaged panel or rail, taking care not to disturb sound sections.
- Check the frame: Inspect posts and remaining rails for rot or weakness; reinforce if needed.
- Fit new components: Use matching materials and corrosion-resistant fixings; seal cut ends with preserver.
- Re-treat: Stain or paint the new section to match and protect the whole run.
Fixing a Sagging Gate
- Tighten or replace loose hinges; use longer screws into solid timber or add repair plates.
- Fit an anti-sag kit or diagonal brace to stiffen the gate frame.
- If the gate post is leaning, treat it as a post repair or replacement job.
Patching Rot and Extending Life
- Cut out small areas of localized rot and fill with a two-part wood repair epoxy for structural patches.
- For surface decay, clean off algae and mould, treat with a fungicidal wash, then apply a quality timber preserver.
- Improve drainage around the base and clear leaf litter to keep timber drier.
Storm Protection: How to Storm-Proof Your Fence
London takes a run of named Atlantic storms every autumn and winter. The Met Office and its European partners name a storm whenever it’s expected to bring an amber or red wind warning, and exposed South East London boundaries — especially the open ground around Woolwich, Plumstead and the Greenwich riverside — take a real battering. A proactive approach prevents catastrophic failure.
Design for Wind Resistance
- Choose the right style: Closeboard with small gaps or hit-and-miss designs perform better than solid, sail-like panels in exposed gardens.
- Use stronger posts: Opt for thicker timber posts (e.g. 100mm) or concrete posts in high-wind areas.
- Increase post depth: Follow the one-third rule (or deeper on very exposed sites) and ensure solid concrete footings.
- Add gravel boards: They protect panel ends from ground moisture and improve overall rigidity.
Use the Right Fixings and Materials
- Use galvanised or stainless-steel screws, brackets, and bolts; avoid lightweight nails in high-wind zones.
- Ensure rails are thick, solid, and securely fixed to posts with proper brackets or notches.
- Any softwood post or gravel board in ground contact should carry Use Class 4 (UC4) preservative treatment — the minimum the Wood Protection Association sets under British Standard BS 8417 for timber that’s frequently wet or touching soil.
- Treat all cut ends with timber preserver and maintain a regular staining/painting schedule — factory treatment only protects the wood until it’s cut.
Manage the Surrounding Garden
- Trim trees and shrubs: Overhanging branches can fall in storms or push against the fence, creating leverage points.
- Clear debris: Remove leaf build-up, moss, and rubbish along the fence base to improve drainage and reduce rot.
- Secure loose items: Bins, furniture, and tools can become projectiles and damage your fence in high winds.
Pre-Storm Checklist
Before any named storm or winter gale season:
- Walk the fence line and push-test each post for movement.
- Inspect rails, panels, and brackets for stress, cracks, or loosening.
- Check gates, latches, and hinges; tighten or repair as needed.
- Clear debris and trim back any vegetation pressing on the fence.
- Log any issues and plan repairs early—small fixes now are far cheaper than full replacements later.
If a storm has already brought your fence down, we offer rapid storm-damage fence repairs across South East London.
When to Repair vs Replace Your Fence
Not every damaged fence needs a full rebuild, but some situations clearly call for replacement.
Repair Makes Sense When:
- Damage is localized (one or two panels, a single post, or a gate).
- The majority of posts are sound, with solid concrete footings.
- Rot is limited and hasn’t spread through multiple components.
Replacement Is Better When:
- Multiple posts are leaning, rotted, or have failed footings.
- Panels and rails are extensively warped, cracked, or repeatedly failing after repairs.
- The fence is old, poorly designed for the site, and keeps needing fixes.
In exposed locations, investing in a properly engineered, storm-proof fence from the start often costs less over time than repeated patch-ups. A free on-site survey will tell you honestly whether a repair will hold or whether replacement is the smarter spend.
Maintenance Plan: Keep Your Fence in Top Condition
A simple maintenance routine dramatically extends fence life and reduces storm risk.
Twice-Yearly Inspections
- Spring and autumn: Check posts, panels, rails, gates, and fixings.
- After major storms: Do an extra walk-through to catch new damage early.
Cleaning and Treatment
- Remove algae, mould, and dirt with a mild detergent or vinegar solution; rinse and allow to dry.
- Reapply timber preserver, stain, or paint according to manufacturer guidelines (typically every 2–5 years, depending on exposure).
Drainage and Ground Care
- Ensure soil slopes away from posts; improve drainage where water pools.
- Keep the base of the fence clear of leaf litter, soil build-up, and stored items.
FAQ: Garden Fencing Repairs, Installation, and Storm Protection
Quick answers to the questions London homeowners ask us most about fencing.
How deep should fence posts be for a 6ft fence?
For a 6ft (1.8m) fence, use 8ft (2.4m) posts with at least 600mm (2ft) buried in a solid concrete footing—roughly one-third of the total post length.
What’s the best fencing for windy gardens?
Closeboard or hit-and-miss panels with thick posts, deep concrete footings, and galvanised fixings perform best in exposed sites. Concrete posts and gravel boards add extra resilience.
How can I tell if my fence post is rotted?
Look for soft, spongy timber at ground level, dark staining, fungal growth, or posts that move when pushed. Probe suspect areas with a screwdriver; if it sinks easily, rot is likely.
Can I repair a leaning fence post without replacing it?
Minor lean with sound timber can sometimes be straightened and re-concreted. Severely rotted or badly leaning posts usually need full replacement for a lasting fix.
How often should I treat or stain my wooden fence?
Typically every 2–5 years, depending on exposure, product type, and local climate. Inspect annually and re-treat when the finish looks faded or water no longer beads on the surface.
What should I do after a storm damages my fence?
- Make the area safe: remove loose panels, brace leaning sections, and clear hazards.
- Document damage with photos for insurance if needed.
- Arrange repairs or replacement promptly to prevent further deterioration.
Ready to Upgrade or Repair Your Garden Fence?
If you’re dealing with storm damage, rot, or an ageing boundary, a professionally installed, storm-proof fence saves you time, money and stress in the long run.
- Repairs: From single panels to full post replacements—see our SE London fence repairs.
- New installations: Timber, cedar slatted or composite, built for your site’s exposure and soil—see fencing in London.
- Storm-proofing: Deeper footings, stronger posts and better fixings to stand up to London’s weather.
Founders Billy Maddox and Vincent O’Connell are personally on-site for every job, and we’re rated 9.87/10 on Checkatrade (23 verified reviews). Get your free on-site survey and quote, or call 07470 419 056.
The Tree Amigos install and repair fences across all 32 London boroughs, with a focus on South East London—Greenwich, Blackheath, Woolwich and Plumstead. See all the areas we cover.
About the Author
Vincent O’Connell is co-founder of The Tree Amigos Landscaping & Gardening Ltd, the South East London landscaping firm he runs with Billy Maddox. Vincent has over five years of hands-on experience building and repairing boundaries across London, from Victorian terraces to exposed riverside plots. He has installed and storm-proofed fences on just about every soil and site the capital can throw at a fence. Every Tree Amigos project is founder-led and Checkatrade-verified at 9.87/10.